Wi-Fi Connection
Follow the procedure below to setup a printer.
 Note
Note
- Notes on Wi-Fi Connection (Appears in a new window)
-
Make sure printer is turned on before starting wireless connection setup.
If the power is on, the ON lamp (A) will be lit.

Printer without numeric buttons

Printer with numeric buttons
 Important
- If printer is performing cleaning, print head alignment, or other processes, wait for the process to finish, before starting setup.
-
Check that wireless router is on.
If it is already turned on, turn it off, and then turn it back on.
Do not proceed to the next screen of this guide until the power is turned on. The connection to the wireless router will be temporarily disabled.
-
Check the screen displayed on the printer.
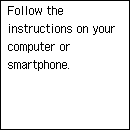
If the following screen is displayed, proceed to the next step.

Printer without numeric buttons

Printer with numeric buttons
If one of the following screens is displayed, press the OK button, and then proceed to the next step.


If the following screen is displayed, press
 (Stop), and then proceed to the next step.
If a different screen is displayed, use the close button to exit your current application software, and then perform the setup again.
The initial screen for printer setup appears via the model selection screen.
-
Use the
 or
or  button to select Settings and press the OK button.
Printer without numeric buttons

Printer with numeric buttons
-
Select LAN settings and press the OK button.
-
Select Wi-Fi and press the OK button.
-
Select Wi-Fi setup and press the OK button.

